HELP CENTER · GETTING STARTED
Build your first guide
A guide is a home screen of sections (Arrival & Access, House Manual, Local Favorites) holding cards a guest taps: a title, a few sentences, and optionally a photo, an address, a button or a video. You never start from a blank page: the AI writes it from your listing in about a minute, or rebuilds the manual you already have.
The whole flow
Step 1. Pick a build path
A new account opens on three cards. Every path ends in the same editor, and nothing you pick here is permanent.
- Connect your listing and let AI write it: connect Airbnb (through Hospitable) or OwnerRez, click Create guide on a listing. The AI reads the listing, places your photos, writes every section and researches real restaurants and things to do nearby.
- Rebuild what you already have: a PDF, Word file, pasted text, or a Touch Stay link becomes a guide in about a minute.
- Start from the sample: a fully written guide where you only swap the [bracketed] details.
Step 2. Rebuilding an existing guidebook
- On the New guide page, under Start from an existing guide, choose My existing PDF or Word guidebook.
- Click Upload a PDF, Word, or text file (up to 50 MB), or paste the text into the box.
- Fill in the property name and click Create. Your words come back organized into sections and cards in about a minute.
Only the text comes over. Add photos afterward from your Library, at full quality. Touch Stay hosts paste the guest link instead: see Switch from Touch Stay.
Step 3. Sections and cards
The editor lists your sections on the left with a live phone on the right that updates as you type. Everything saves automatically.
- Click the arrow on a section to see its cards.
- Open a card to edit its title, details, address, photo, button or video.
- Reorder with the up and down arrows, rename by typing, add with + Add an item at the bottom of each section, or Delete.
Two to five sentences per card reads best on a phone. If a card wants more, split it into two cards guests can tap separately.
Step 4. Address, cover photo and look
- Type the property address at the top of the editor. It adds a tap-for-directions link and switches on the Map and Weather tabs.
- Upload photo for the cover, or Choose from library. Add a logo if you have one.
- Pick one of the six layouts and one of the fifteen themes. Your content is identical in every layout, so click through them and watch the phone.
Step 5. Publish, then open it on your phone
- Change the Custom link if you like, then click Publish at the top.
- Point your phone's camera at the QR code in the green Your guide is live panel, or use Copy link, Download QR Code and Download PDF Guidebook in the sharebar.
Your first guide is free for 30 days with no card. After that, or for more guides, each live guide is one $6 license.
What guests see
The same link works on a phone, a tablet and a laptop. On a phone the guide is a tap-through app with Guide, Map and Weather tabs; on a desktop it becomes a full spread. Guests never install anything and never sign in.
Common questions
Can I build the whole guide before paying?
Yes. Everything up to Publish is free with no time limit: build, preview every layout, run the AI, edit as long as you like. Your first published guide is free for 30 days too, with no card.
Where did the local recommendations come from, and can I add them to a sample guide?
The AI build writes them from your listing and address. A sample or PDF guide does not run that research; add your favorites as cards in a Local Favorites section, with an address on each so it gets a map pin.
What happens if I unpublish?
The guide's link stops working for guests and its license is freed for another property. Your content stays exactly as it was; republish any time.
Can I copy a guide to another property?
Yes. On the New guide page, choose any guide you marked as a template under Start from an existing guide. See Templates and multi-property guides.
Go further
A guidebook is the start of the stay. These run on it, at the same properties, from the same dashboard.
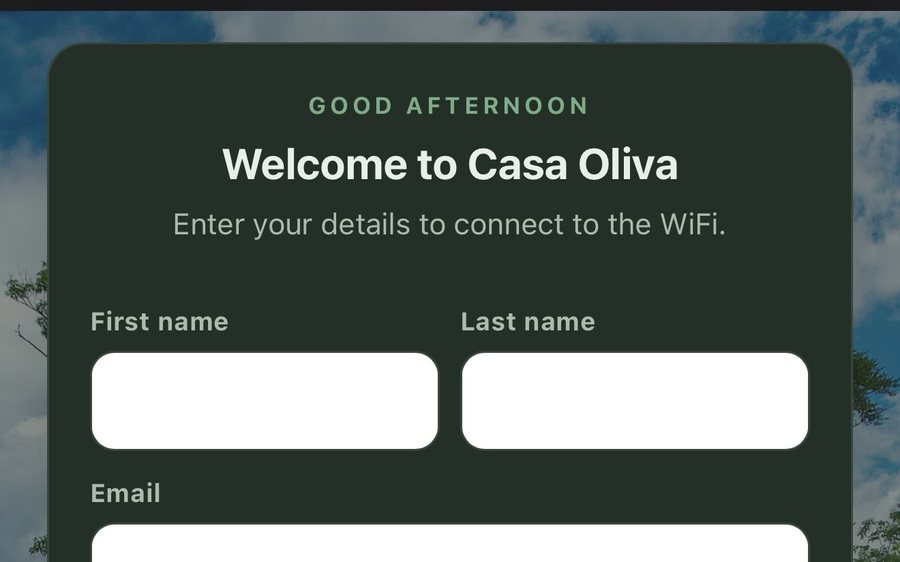
Guest WiFi
Guests join your network through a branded sign-in page and land in the guidebook. Every name and email is yours to keep. Runs on the UniFi gear you already own: $6 a network, the first free for 30 days.
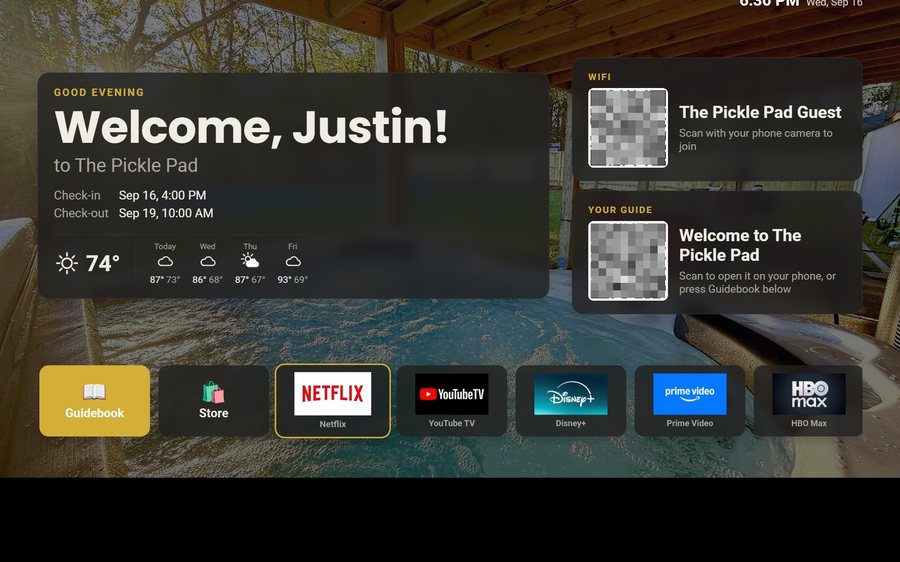
Guest TV
Your guidebook on the onn or Google TV in the living room: a welcome by name, the WiFi and guide codes on screen, and every app signed out at checkout. $6 a property for up to three TVs, the first free for 30 days.
Still stuck?
Email support@tabellara.com and a human will help; we usually reply the same day.
All help articles