HELP CENTER · GUEST WIFI
Set up a new UniFi Express for Guest WiFi, out of the box
This guide starts with a UniFi Express still in its box and ends with a guest signing in on their phone and landing in your guidebook. It takes about twenty minutes, most of it waiting for the Express to update itself. You do not need to replace your internet router: the Express plugs into it. The pictures show a UniFi Express 7; other UniFi consoles such as the Express, Dream Router and Cloud Gateway walk through the same screens. Already have UniFi running? Use Set up Guest WiFi instead.
From the box to a guest signing in
- What you need before you start
- Step 1. Plug it in and open the setup page
- Step 2. Create your UI account
- Step 3. Name your own WiFi network
- Step 4. Let it update, then sign in
- Step 5. Create the Tabellara service user
- Step 6. Copy the MAC address
- Step 7. Connect it in Tabellara
- Step 8. Create the guest network
- Step 9. Test it from your phone
What you need before you start
- A UniFi Express (this guide uses the Express 7) with its power cable and the Ethernet cable from the box. Ubiquiti sells it directly: UniFi Express 7 at the UniFi store.
- Your internet modem or router, with a free Ethernet port. The Express connects to it; nothing you have is replaced.
- A computer with an Ethernet port or adapter, for the first few minutes only.
- A published guide in Tabellara for the property. The guest network hands guests to it.
Your first guest network is free for 30 days. After that it is $6 per network per month, however many access points broadcast it.
Step 1. Plug it in and open the setup page
- Plug the Express into power.
- Run an Ethernet cable from your modem or router to the internet (WAN) port on the Express, the one marked with a globe.
- Run a second cable from the other port on the Express to your computer.
- On that computer, open a browser and go to 192.168.1.1.
- Give the console a name (the property's name works well) and click Next.
Nothing loads at 192.168.1.1? Give the Express two minutes to finish starting, and check that your computer's cable is in the Express, not in your old router.
Step 2. Create your UI account
A UI account is your free Ubiquiti login. It is what lets you, and Tabellara, reach the Express from anywhere.
- Enter your email, pick a username and a password of at least 12 characters, agree to the terms, and click Create UI Account. Already have one? Click Sign In instead.
- Ubiquiti emails you a six-digit code. Type it in.
Do not choose Proceed Without a UI Account. Tabellara reaches your Express through UniFi's remote access, and that needs a UI account on the console.
Step 3. Name your own WiFi network
This first network is yours: the one your own phone, locks, cameras and TVs will use. Guests get a separate network of their own in Step 8.
- Type a Wi-Fi Name and a Password, then click Next.
- When you see Setup Complete!, click Go to Dashboard.
Step 4. Let it update, then sign in
- Your browser may warn that the connection is not private. That is expected for a device on your own network: click Advanced, then Proceed to 192.168.1.1.
- The Express now downloads its latest software and restarts by itself. It takes about five minutes. Leave it plugged in.
- When the UniFi OS sign-in screen appears, sign in with the username and password from Step 2.
Do not unplug the Express while it says Console Updating.
Step 5. Create the Tabellara service user
Tabellara manages the guest sign-in page through its own user on your console. You can remove it at any time and the sign-in page simply switches off.
- Click the people icon at the bottom of the left-hand bar.
- Click Create New, then Create New User.
- First name IT, last name Tabellara, email it@tabellara.com. All three must be exactly right or the connection fails.
- Check the Admin box. Leave Use a Predefined Role checked with the role on Super Admin.
- Click Create.
No Admin checkbox? Remote access is off on the console. Go to Settings › Control Plane › Console, turn on Remote Access, then create the user again.
Step 6. Copy the MAC address
The MAC address is the Express's serial-style address. It is how Tabellara knows this console is yours.
- Click the Devices icon in the left-hand bar.
- Click your UniFi Express in the list. A panel opens on the right.
- Find MAC Address in that panel, select it, and copy it.
It is also printed on the label underneath the Express, six pairs of letters and numbers such as 8c:ed:e1:22:24:f0.
Step 7. Connect it in Tabellara
- In your Tabellara dashboard, open Guest WiFi.
- Paste the address under Access point MAC address and click Connect.
- Your console appears under Sites, with a note that it is connected.
We do not see that access point yet? The invitation from Step 5 takes a couple of minutes to reach us. Wait two minutes and click Connect again.
Step 8. Create the guest network
- Click Add a WiFi network.
- Under Guests on this network land in, choose the guide for this property.
- On Create a guest network, marked Recommended, click Create it.
- Type the network name guests will see and the WiFi password you will give them.
- Click Create and turn on.
Keep the network from Step 3 for your own devices. A sign-in page makes every device prove itself, and a smart lock or thermostat cannot, so guests get a network of their own.
Step 9. Test it from your phone
- On your phone, open WiFi settings and join the guest network with the password from Step 8.
- The sign-in page opens by itself. Enter a name and email and tap Connect to WiFi.
- Your guidebook opens, with your store if you have one. The phone is online for 30 days before it is asked again.
The page does not appear? Turn the phone's WiFi off and on, or open any website. Phones sometimes take a few seconds to notice a sign-in page.
Next: Design the WiFi sign-in page →
Common questions
Do I have to replace my internet router?
No. The Express plugs into the modem or router you already have and adds its own WiFi alongside it. Your provider's equipment can stay exactly as it is.
Which UniFi devices does this guide cover?
It was written with a UniFi Express 7. Other UniFi consoles that run their own setup, such as the Express, Dream Router, Dream Machine and Cloud Gateways, go through the same screens. If your UniFi network is hosted or already running, follow Set up Guest WiFi instead.
Why does Tabellara need a Super Admin user?
Creating the guest network and switching its sign-in page on are settings changes, and UniFi only allows those from an admin. The user does nothing else: it does not read your traffic or your devices' activity, and removing it from the People page ends its access at once.
Can I use the network I made during setup for guests?
You can, but a separate guest network is better. Turning the sign-in page on makes a network a guest network, which isolates devices from each other, and your own locks, cameras and TVs need to stay reachable.
What does a guest have to do?
Join the network with the password, type a name and email once, and tap Connect. Every phone in the house does this, so you collect each guest's email, not only the person who booked.
What does it cost?
The first network is free for 30 days. After that it is $6 per network per month, however many access points share it, on top of the guide's own license.
Go further
A guidebook is the start of the stay. These run on it, at the same properties, from the same dashboard.
Tabellara TV
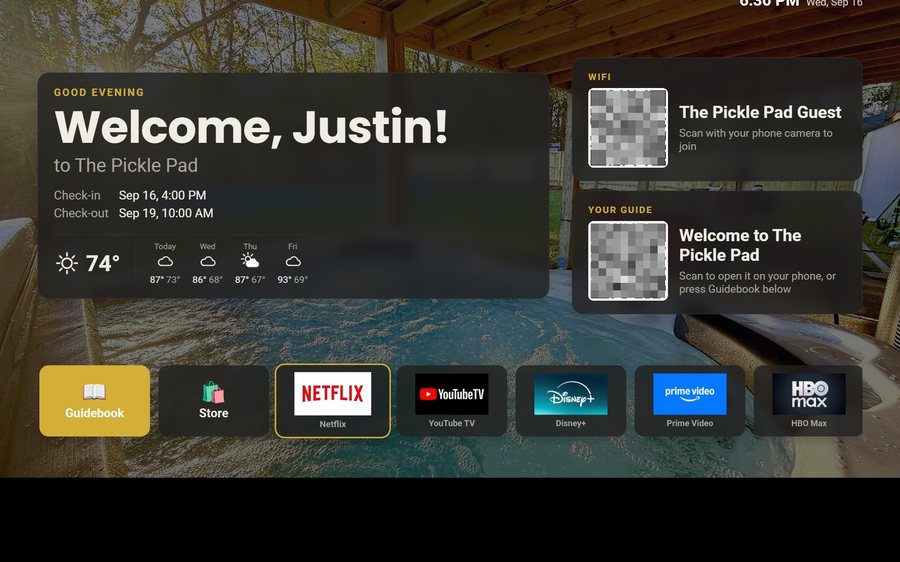
Your guidebook on the onn or Google TV in the living room: a welcome by name, the WiFi and guide codes on screen, and every app signed out at checkout. $6 a property for up to three TVs, the first free for 30 days.
Tabellara Store
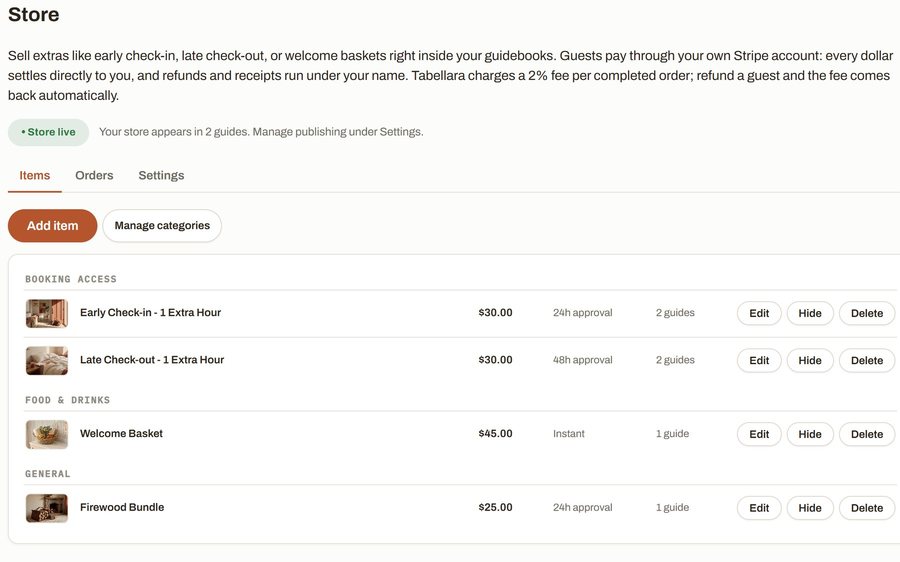
Sell late checkout, a welcome basket or firewood from inside the guide, paid through your own Stripe account. 2% per completed order and no license.
Still stuck?
Email support@tabellara.com and a human will help; we usually reply the same day.
All help articles